 For anyone over 40 (or maybe 30), having a music collection probably means that, in addition to racks of CDs and ridiculous piles of MP3s, you’re also sitting on bookshelves (or “borrowed” milk crates) full of vinyl LPs. Hundreds of pounds of space-consuming, damage-prone vinyl. LPs were music you could touch, with glorious full-color 12″ album art, meandering liner notes, and the practical involvement of lowering needle to plastic. Long-playing records represent an era when music was less disposable – we actually sat down to listen, rather than treating music as a backdrop to the rest of life. Dragging a rock through vinyl was not some kind of nostalgic love affair with the past – it was just the way things were. The cost of admission was pops and scratches, warped discs, having to get up in the middle of an album to flip the disc, cleaning the grooves from time to time, and getting hernias every time you moved to a new apartment.
 We loved our vinyl despite and because of its warts, but we also didn’t hesitate to go digital when the time came – first with CDs, and then with MP3s and other file-based formats. We complained that CDs lacked the “warmth” of vinyl, but CD technology got better over time. We complained that the typical MP3 was encoded at bitrates too low to do justice to the music, but we learned to encode at higher resolutions, or to use uncompressed/lossless formats. Eventually, most of us gave in to temptation and started listening only (or mostly) to files stored on a computer somewhere in the house. Over time, many of us stopped listening to LPs altogether – but that doesn’t mean we got rid of them.
I personally held onto around 700 records made before the 90s, in addition to a few boxes of records my parents left in my care. Most of my CD purchases from the 90s and 00’s had been ripped long ago, but the LPs were locked in limbo – wasn’t listening to them, but couldn’t bear to let go, either. In 2011, I finally decided it was time to hunker down and digitize the stacks, to un-forget all those excellent records.
Digitizing LPs has almost nothing in common with ripping CDs. It’s a slow process, and a lot of work. But it can be incredibly rewarding, and going through the process puts you back in touch with music the way it used to be played (i.e. it’s a great nostalgia trip). In this guide, I’ll cover the process of prepping your gear, cleaning your records, and capturing as much of the essence of those old LPs as possible, so you can enjoy them in the context of your digital life.
Setting Up
 So you want to digitize your LP collection? That’s awesome, but slow down, cowboy – this isn’t going to happen overnight. When you rip a CD, the whole process is pretty much automatic – stick it in, click Go, and you’re done in minutes (my iMac’s optical drive rips at around 16x). The metadata (album title, artist, track names, recording year, and album art) are often retrieved automatically, and you never give a thought to dealing with surface noise. But when you square off with a stack of LPs, you find out quick that you’ve got some hurdles to clear – I was totally unprepared for how involved all of this would become. I’ll say it again: This is going to be a process – a long one. It’s going to take a while to get your gear in order, you’ve got several decisions to make, and each LP you “rip” is going to take actual time. Fortunately, once you get a groove on, things flow pretty smoothly. You just have to forget that you’ve been spoiled by the ease of ripping CDs, change mental gears back to analog mode, and look forward to getting hands-on with your music again.
Here’s the general roadmap – I’ll go into each of these separately below:
- Tune your table
- Make the connection
- Clean your vinyl
- Pick the right software
- Decide what to rip and what to toss (and what to re-purchase)
- Pick an output format
- Establish a workflow
- Deal with noise
- Export tracks
Tune Your Table (and Cartridge)
Because of the time involved, you want to go through this process exactly once. If you’re going to do this thing, do it right. You need to think now about a listening picture bigger than your iPhone and earbuds, bigger than your desktop computer speakers. The “ultimate” goal is that you can play the final result through the best amp and speakers you can find, and it’ll be indistinguishable from the original (or as close to it as possible). In fact, it may even be better, if you filter out pops and scratches carefully. Who knows what kind of home stereo you’re going to have 10 or 30 years from now? Think long-term.
 So if the process is so time-consuming, why not just re-purchase everything? If you’re sitting on a lot of LPs, buying a new digital copy of every album is going to be expensive (even though a lot of older LPs are available at emusic.com and mp3.amazon.com for $5-$7). Sure, your time may be worth more than what it takes to digitize everything yourself, but not everything needs to be an ROI/time-is-money calculation, right?
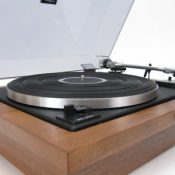
If you haven’t thought much about your turntable for two decades, take time out to make sure it’s in top condition before beginning. It makes no sense to spend dozens or hundreds of hours digitizing if the audio quality is going to be diminished for want of a new needle, or because your cartridge hums or your turntable transmits motor noise. Think of yourself as an archivist, creating a collection you’ll be proud to pass down to your children.
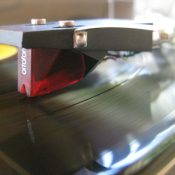
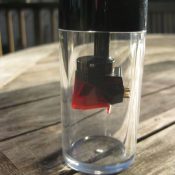 I was pretty happy with my old Pioneer PL-A35 – built solid and totally reliable – but I had forgotten how long it had been since I’d replaced the cartridge and needle. Contacted Jim at Needle Doctor and told him I wanted the best setup he could recommend for a Benjamin or less. He suggested the Ortofon M2 Red, and I went for it (to blow your own mind, surf around the Phono Cartridges section of that site to see what you can get for 15 large (yes, $15k!). To be sure I’d made a good decision, I digitized the same album both before and after installing the Ortofon, and the difference in tonal range and responsiveness was very audible – a new cartridge was a worthwhile investment.
If you’re not sure whether your turntable is up to snuff, take it to a qualified audio shop and ask their opinion. You might want to have them do an alignment and lubrication, or let them talk you into a new turntable.
Hooking Up – The turntable-computer connection
Traditional turntables output audio at a level lower than standard line-level. In other words, you can’t just plug a turntable’s RCA cables into your computer and expect it to work. You’ll need either a dedicated phono pre-amp or a turntable with a built-in line stage or USB jack.
There are a lot of turntables on the market with built-in USB connections, many of them specifically designed for digitizing old collections. But many of them are cheap pieces of lightweight junk, and just not worth it (especially the inexpensive models). In most cases, you’ll be better off with a well-designed traditional table and outboard analog-digital converter (ADC).
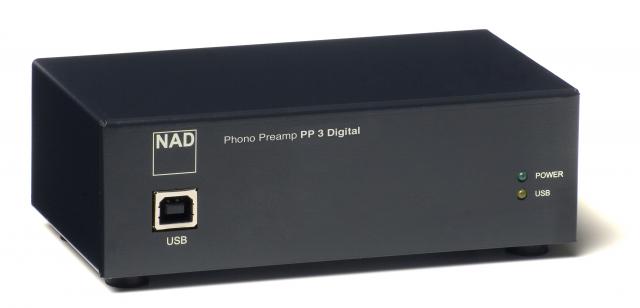
There are a dozen or so USB phono pre-amps available on Amazon, ranging from $50-$1200. My darling wife got me the NAD PP-3 for Christmas (around $200, but no longer available). Since it has both USB and RCA outputs, I’ll still be able to use it in the home stereo for standard LP playback once the digitization process is complete (though it’ll be connected to my computer for the foreseeable future :) Honestly, I can’t tell you what to look for in a USB ADC/pre-amp. In general, you get what you pay for. The cheapest one (of anything) is almost never the right decision, but the really high-end audio stuff works in a realm of sub-sonic quality differences that my ears simply can’t hear. If you’re at a loss, just go for something priced in the middle range, from a manufacturer with a decent reputation.
Once connected to my iMac, I went to the system’s Sound Preferences panel and selected the NAD as the input (I did have to reboot the machine before it was recognized, surprisingly). After that, output from the turntable was available to all the audio capture software I tested.
Make sure the turntable is resting on a solid desk and is not overly sensitive to footsteps in the room – you don’t want perceptible warbling in the audio when walking nearby (if you have kids, make sure they know to walk softly when daddy’s busy ripping :). You don’t want to find out that some of your recordings were marred by vibrations months later, after you’ve finished the process and ditched some of your LPs. If you’re in a room with a bouncy floor, consider setting up your digi-station in another room, maybe with a laptop dedicated to the process.
Cleaning Your Vinyl
Dust = Noise
 The quality of my vinyl collection spans the gamut from old garage sale finds and hand-me-downs to impeccable 180-gram vinyl from Mosaic, and everything in between. Most records that have been in my personal care have been sleeved and played with the cover down all their lives, and so have fairly minimal dust. Nonetheless, virtually all of my records turned up some dust in the cleaning process. Since you’re shooting for archival quality here, you want that stuff out of the grooves before encoding. In addition, depending on your environment, your records probably have collected a static electrical charge that can affect the quality of the final output.
DAK has a great page full of electron microscope photographs showing LP surfaces before and after cleaning with their system. If you don’t think your records are dusty, or that dust and static can affect recording quality, give it a read.
Dust in record grooves, as seen with an electron microscope. Check the DAK page for more examples.
There are a number of vinyl cleaning systems out there, from simple brushes to carbon micro-fibers to full-on record vacuuming systems. I wanted to clean, but wasn’t going to get all mad scientist about it. Found my old Discwasher brush from the 70s, still in amazingly good shape after all this time, but the fluid bottle was dry. Using fluid is important not just for cleaning purposes, but also to dampen or remove residual static charge. A bit of searching turned up dozens of home-brew fluid recipes, and I settled on this one:
- 3 parts distilled water (triple distilled, de-ionized)
- 1 part Isopropyl alcohol, 91% lab grade
- A few drops of photographic wetting agent €“ if possible Triton X-100, Triton X-110 or Triton X-115 or Monolan 2000, not Kodak Photoflo which is €˜reputed€™ to leave a residue (though used by some). Recommended is 12 drops per gallon or 2-3 drops per litre, though some use up to 8 drops per litre. If you add too much, the fluid gets sudsy on the record.
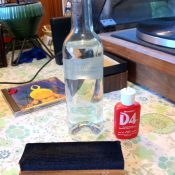 Not having easy access to Photoflo or its cousins, I substituted a few drops of windshield wiper fluid as recommended at another site. Sounds strange, but because the dilution is so great, figured a micro-amount of what is essentially Windex+soap couldn’t hurt. Because I had so many records to do, I made almost a quart of the stuff in advance, which I transfer to the little Discwasher squirt bottle as necessary.
Before recording each side, I squirt two lines of fluid onto the leading edge of the brush and do a slow, steady roll from wet side to dry side. Results have been great, and I’ve pulled visible amounts of dust out of virtually LP side I’ve cleaned.
Everything you can do to extract all the audio goodness possible out of your LPs is worth doing (within reason). Don’t skip the cleaning process!
Pick the Right Digitizing Software
Technically, you could use any audio software capable of digitizing two-track audio and outputting to MP3 or other formats. But there’s a heck of a lot more to the process than capturing audio. Digitizing LPs is an entire workflow, which involves:
- Capturing
- Finding track boundaries/splitting tracks
- Looking up metadata (album title, artist, year, genre, individual track titles, album art)
- Cleaning up clicks and scratches
- Cleaning up other noise (hum, etc.)
- Outputting to multiple formats
If your software can’t help with every part of that process, you’re going to waste a lot of time doing things manually that should be semi-automatic. You want software that’s built specifically for the LP/cassette digitization workflow. And that means that software such as Audacity, Garage Band, and even Pro Tools are out of the running. I can’t stress this enough – do not waste your time with general-purpose audio-editing software. Use software purpose-built for digitizing LPs.
Since LPs can’t be looked up automatically in a database like iTunes and other ripping software does with CDs, you need software that can make the track naming process easier. I tried a few apps before settling on AlpineSoft’s Vinyl Studio. A trial version came with the NAD pre-amp, and I was blown away by how much easier it made things than the Audacity-based workflow I had been working with previously. Available for both Windows and Mac, VinylStudio does everything listed above, and uses a tabbed interface to segment the workflow intuitively. It’s not gorgeous by modern Mac software standards, but it does exactly what it claims to do, and it does it really well. Two features alone make it completely worth the $30:
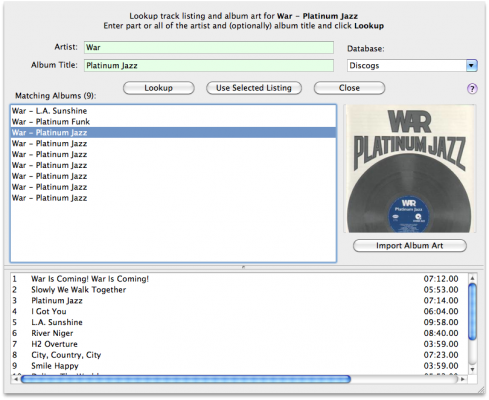
- Integration with external track databases. Tell VinylStudio the artist and album name and it’ll try to find that album in MusicBrainz, Discogs, and other open source/collaborative music databases. Select one its search results and VinylStudio will use that data to suggest track breaks. Which means you don’t have to find all the track breaks yourself, and you don’t have to type in all the track names by hand. If it can’t find a match, VinylStudio has a “Scan for track breaks” feature that will do its best to mark the quiet sections between tracks. You’ll still have to type in track names manually in that case, but it’s still a time saver over finding track breaks manually. More on this process later.
- Start/stop recording on needle up/down. One thing you don’t want is to have to sit there babysitting the turntable, waiting for one side to end so you can pause recording and start the other. VinylStudio listens for needle down and up thresholds, which means you can leave the room and trust that recording will have stopped when you return after dinner. When you have hundreds of LPs to import, this feature alone is worth the price of admission.
For albums that VinylStudio couldn’t find in third-party databases, I also got a bit of help getting everything tagged correctly with a $30 app called CoverScout, which examines your collection for missing artwork, then looks it up in Google Images, Amazon, and other services. A bit pricey, but I ended up with hundreds of albums without artwork, and CoverScout helped me get them all decorated – money well spent.
Of course I didn’t try everything on the market – I stopped looking when I found VinylStudio. Got others to recommend? Leave a note in the comments.
What to rip and what to toss (and what to re-purchase)
Because the process is so time-consuming, you’ll probably want to start by eliminating LPs that you simply don’t care about anymore. I personally made three piles:
- Discard (sell)
- Encode, then discard
- Encode, then keep
 I was able to put about a quarter of my records in the Discard pile, which reduced the workload quite a bit. Since I’m a romantic fool, my plans for much of the second category were thwarted by nostalgia. There are a lot of records I haven’t played for 20 years, and that I’m going to have nice clean digital versions of when done, but that I still can’t bring myself to discard (Oscar Brown’s 1972 “Fresh” ? Yeah, gotta keep that. No idea why – maybe because I love the cover. LPs have a weird effect on me). So the second pile didn’t end up as large as I had hoped, unfortunately. Hopefully you’ll have better luck being ruthless with yourself than I was.
In most cases, the decision about what to re-purchase was based on the condition of the LP. If, after digitization and cleaning, I still wasn’t happy with the sound, I’d delete what I’d just digitized and go find a pristine copy at emusic.com or mp3.amazon.com (or every so often at iTunes, though their prices are virtually always higher). iTunes sells music encoded at 256kbps AAC (equivalent to 320kbps MP3), while emusic and mp3.amazon sell music at a fairly high VBR (variable bit rate), which means the bitrate goes up for complex passages and down for simple passages. More on VBR vs. CBR later, but suffice to say the quality is very good and I’m happy with them.
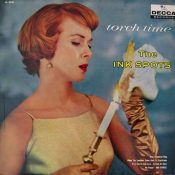
 One thing that surprised me was how often I’d find records that I decided needed to be re-purchased, only to find that I couldn’t. I understand when an LP or CD goes out of print in physical format, but in the digital world, what’s the point of anything being “out of print?” Isn’t that what the long tail is all about – selling small amounts of old things because it basically costs nothing to do so? For example one of my favorite Bill Evans records of all times, “Spring Leaves” on Fantasy/Milestone with Scott LaFaro and Paul Motian – you’ll find dozens of Evans records on eMusic, iTunes and mp3.amazon, but not this one. Same deal with Public Image’s “First Issue,” Funkadelic’s “Uncle Jam Wants You,” and the Ink Spot’s “Torch Time” – nowhere to be found at the online stores. You’d think the online catalogs would have everything, but licensing apparently gets in the way. For these and many others, I had no choice but to encode from LP and do my best to clean them up.
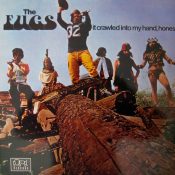 There were also records that presented interesting challenges, like The Fugs’ “It Crawled Into My Hand, Honest,” which includes many tracks that flow into one another, some as short as 10 seconds long. Deciding where to place track breaks with these was a challenge. The right thing to do is to let these “flow-together” tracks remain as a single uninterrupted file. But if you do that, you end up with fewer total tracks than are shown on the album’s track listing, so the encoded set doesn’t look complete. And what are you going to name the flow-together tracks? I encountered the same problem with a 1950s Smithsonian/Folkways box set passed down from my grandfather, “Leadbelly’s Last Recording,” which was originally recorded with Leadbelly talking in between the tracks, leaving no discernible break between songs. In cases like these, I decided maybe I didn’t really need to digitize everything, and to just be happy owning the LPs (nothing wrong with that, right?)
Fakes
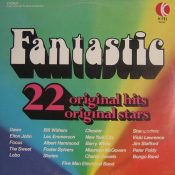 In the 70s, I was a sucker for those K-TEL and Ronco hit collections, and I picked up quite a few more in the 80s for “camp” value. But digitizing these was going to be a lot of extra manual work, since I wasn’t having luck looking them up in the Musicbrainz or other databases, and all the artist names were different. It was also going to involve figuring out all the overlap – a lot of these records duplicate songs from each other. So I decided to just re-purchase a few of them and call it a day. Easier said than done. The original collections aren’t available at any of the services. So I decided to buy a few of the new collections. But I discovered something weird – most of the songs didn’t sound right. Either they were second or third takes from the original studio sessions, or they were crafty impersonations by copycat bands. It was really disconcerting. Yes, audio previews are available, but the fakes are actually good enough that unless you listen closely before buying, you kind of assume/think they’re the original tracks.
At first I thought it was just me, but do a search like this and look for the collections with 1-star ratings. Click on those and read the customer comments – something very weird is going on here, and I’m not sure what. I wrote to Amazon and complained and they cheerfully refunded the money. I was impressed by that, but still not sure how to proceed with the KTEL/Ronco collections. Will probably just bite the bullet and do them manually.
I have not experienced this problem with any other purchased downloads – just the 70s collections.
Picking an output format
3,000-year-old Egyptian papyrus is still readable today. But 1990s word processing documents written in WordStar? Images made on a 1978 Atari? Video created on an early version of Windows? Good luck finding a way to read any of those formats. You see where I’m going with this. LPs were entrenched in our culture for decades, and I expect it will be easy to find a turntable capable of playing any of the records made throughout the 20th century for many decades to come. But file formats are somewhat transient. As better ones come along, the old ones slide into obsolescence.
I had two criteria in selecting an output file format: I wanted the best quality possible while using a reasonable amount of disk space, and I wanted to not feel paranoid that the file format would be obscure in 20 or 30 years. I’m creating an archive here, and that means I want this stuff around for a very long time to come. I want to be able to pass this music on to my son someday.
 WAV and AIFF are the two main uncompressed formats, and they’re so ubiquitous I’m sure they’ll be readable for decades to come. But I’ve got 500+ records to encode here, and I’m not willing to commit that much disk space. Yes, storage is cheap, but 500 records in an uncompressed format, on top of the 200GBs of music I’ve already stored, could mean having to move to multiple drives, which would be a pain to access as a single music library. Formats like Apple Lossless (ALAC) and FLAC (Free Lossless Codec) save around 50% of the disk space over WAV/AIFF, and sound great of course, but I’m a little skittish about them being around in 50 years. Maybe they will, maybe they won’t.
Another factor that tipped the scales against lossless for me was the fact that dynamic range has been so squashed out by modern recording techniques. I’ve written about this before; but the point is made well in in this cnet article:
The loudness wars of the 90s ruined all the quality gains digital music had made – listening to a recording as a FLAC or Apple Lossless file can’t undo dynamic range compression or overzealous equalization.
It’s true that most of my LPs were originally recorded before the 1990s, so this problem won’t affect most of my stuff — but I do have a number of more modern records for which it is a factor. Bottom line is that I just can’t perceive enough difference between FLAC/ALAC and high-bitrate MP3 to make the extra disk space and the prospect of obsolescence worth it.
 Amongst lossy compressed formats, AAC is the default codec used with iTunes – it’s the audio layer of MPEG-4, and has pretty deep penetration. MP3, of course, is the grand-daddy of audio compression, and is simply everywhere. I have no doubt MP3s will be readable 50 years from now. With AAC and MP3, quality goes up as bitrate goes up as file size goes up. A 320kbps MP3 is, to my ears, completely indistinguishable from an ALAC or FLAC file, and uses about a third of the space. And using VBR level-zero compression gets you the same quality as 320kbps CBR (or better), using even less disk space. So, for me, VBR-zero provided the best balance between audio quality, file size, and promise of permanence. Your mileage may vary, and I respect you no matter what you decide (no format wars, please :).
For more on MP3 compression, see CBR vs VBR, below.
If you’re willing to invest in a giant hard drive (and have a way to keep it backed up off-site), you have another option: Save the original uncompressed version in a digital storage vault, and put the compressed version in your regular library for daily use. In VinylStudio, you start with “Recordings” which should be in a high-quality uncompressed format. You then output your cleaned up audio at the end of the process. So, in essence, this two-format process is baked into the VinylStudio workflow, if you want it to be. But I didn’t go that far – I just kept the high-bitrate MP3s and ditched the uncompressed originals. Living dangerous, right?
Here are notes from my listening tests as I was deciding on an output format:
Bought a copy of Steely Dan’s “Aja” from the iTunes store (256kbps AAC) for “reference”, then digitized versions of the same album from LP with:
- Old Shure cartridge, uncorrected VBR0 MP3 (pretty good but had slight hum)
- New Ortofon cartridge, uncorrected VBR0 MP3 (more range, less hum – good purchase!)
- New Ortofon cartridge, corrected VBR0 MP3
By “corrected” I mean “with pops and scratches removed” – a process that cleans up the signal quite a bit, but with a very (very) slight impact on dynamic range. Of course the purchased AAC version sounded the cleanest, being completely free of surface noise, but the LP versions felt, richer, and more alive.
 This test verified my decision that I wasn’t losing anything noticeable by going with MP3, and gave me the opportunity to listen really closely to differences between the corrected and uncorrected versions. This was a tough one. There is a very slight (and I mean very slight) difference in tonal range post-correction. But at the same time, the click reduction is dramatic, and definitely did enhance the quality of the listening experience. However, every correction you make has a slight impact on overall audio quality. Since every record is in different condition, you may decide that the quality hit isn’t worth it. This one is going to be a judgement call on a per-record basis, not something I apply automatically to every record.
In a second experiment, the guinea pig was a 180-gram audiophile recording of Sonny Rollins’ “Way Out West” (a true treasure of jazz). For this one I did four encodings with the new Ortofon cartridge:
– ALAC corrected
– ALAC uncorrected
– MP3 VBR0 corrected
– MP3 VBR0 uncorrected
I then de-waxed my ears, plunked down in the sweet spot in the living room, cranked it up, and did my closest listening, trying to decide whether I wanted to go corrected or uncorrected from here on out. Same conclusions – I like the click-corrected audio better for most LPs. Even when dealing with a really high quality LP in good physical condition, click-reduction removes enough surface noise to enhance the overall experience.
 Then I listened to the corrected ALAC and MP3 versions side by side, queuing them up to the same passages for reference. I could tell a difference, but it was incredibly subtle. The ALAC version was just the tiniest bit fuller, very slightly more resonant. But the difference was so subtle that it felt like splitting hairs. If you’re doing any of the things most people do while listening to music – dancing, working, studying, doing dishes, having a dinner party – there simply is no practical difference (this is the opinion of my ears, and is not a recommendation – do your own tests!)
Since the ALAC versions are more than twice as large filesize-wise, and because of my hesitancy about the future/compatibility of ALAC, I made my final decision: I’d be saving VBR0 MP3, click-corrected audio from here on out.
Note: VinylStudio can also do a wide array of rumble, hum, and other noise corrections. Since I was already very happy with the sound, and not wanting to mess with things further, decided not to tweak those. I just do a quick click-scan pass at the end of each recording and move on to the next.
CBR vs VBR
LAME is the MP3 encoder used by VinylStudio and most other MP3 creation software these days, and it rocks.
Today, LAME is considered the best MP3 encoder at mid-high bitrates and at VBR, mostly thanks to the dedicated work of its developers and the open source licensing model that allowed the project to tap into engineering resources from all around the world. Both quality and speed improvements are still happening, probably making LAME the only MP3 encoder still being actively developed.
MP3 files can be generated either at a Constant Bit Rate (CBR), which means that every second of audio has exactly the same number of bits, or at Variable Bit Rate (VBR), which means more data is allocated to complex passages of audio, and fewer bits to simpler passages. Rather than shooting for a consistent bit rate, VBR encoding shoots for a consistent level of quality, which is what we really care about. Ten years ago, when I was writing MP3: The Definitive Guide for O’Reilly, 320kbps CBR was considered the “pinnacle” of MP3 encoding techniques. But VBR technology has improved steadily in the past decade, and LAME’s handling of VBR is the best. It’s been tweaked and tested endlessly by audiophile engineers on equipment that costs more than your car :)
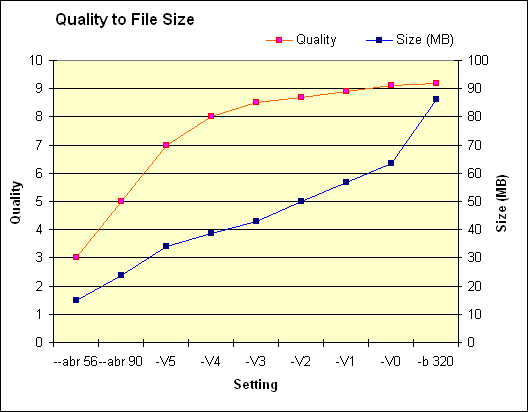
VBR encoding lets you select a quality level set not in kilobits per second, but with a target quality ranging from 0 to 9, where 0 is the best and 9 is the worst. Level Zero VBR with the LAME encoder really is the best quality you’re going to get with MP3 today, and it is truly excellent at very reasonable file sizes (roughly 2MBs per minute). There actually is one level of quality beyond zero, which LAME calls “insane”, but as this chart illustrates, the quality increase at the insane setting is negligible, while the file size spikes upwards. It is simply not the case that more bits necessarily means more quality.
File size increases as quality increases, but at a certain point you hit the wall of diminishing returns.
Establish a workflow
With your gear dialed in and all the big decisions made, you’re ready to dive in. It’s going to take a bit of practice before things start to feel smooth – the first few records you rip are going to involve some trial and error, but pretty soon you’ll have a satisfying workflow happening. Of course, you’ll need to capture your records in real-time (unlike CD ripping, which can happen at up to 16x). Add in the time to clean, split and massage track breaks, look up metadata and find album art, and you can expect the process to take about an hour per album. But you don’t need to be present for most of that time of course – the actual manual involvement will be around 5-15 minutes per album, depending on how much can be looked up in databases.
VinylStudio includes excellently detailed documentation on every step of the process, and you should definitely read up, but here’s my overview:
- Create an “Album”
- Record
- Look up metadata
- Find track boundaries/split tracks
- Clean up pops and scratches
- Export (can be done in batch mode)
When you first set up VinylStudio (I’ll call it VS from here on), it’ll ask you to set a recording format. This is not the same as the output format – you can output to any format later in the game. It’s asking in which format you want to store the recordings internally. These are the versions you’ll be splitting up into tracks, de-clicking, burning to CD (if you swing that way) and possibly storing in your long-term high-fidelity storage vault. I chose AIFF 44KHz, 16 bit.
If you’re going to export to MP3 later, you’ll need to install the LAME encoder and tell VS where to find it – the program does not come with its own MP3 encoder for copyright reasons. Follow the directions carefully and make sure you get the recommended version – other builds of LAME come with libraries in formats that VS can’t use.
The VS interface is arranged in tabs that mirror the general workflow. Start with the Record tab and enter the Artist and Album, recording year and genre of the LP you want to start with. This is needed for file and folder name creation, your own reference, and to give hints to the “Lookup” feature so it can find track names and lengths for you later on.
 If you have an analog hookup, you’ll need to pay attention to your recording levels. Most digital interfaces don’t allow altering the recording volume, so just click the big ol’ Record button. VS won’t start recording immediately – it’ll wait for the burst of noise generated by a needle drop, so you can now spin up the turntable and clean your record. When you physically lower the needle, actual recording will begin. About 10 seconds after the end of Side 1, recording will pause automatically. Flip the record, clean, and click Continue. Recording will resume when you drop the needle. Again, this Needle Down feature is a huge boon, since it allows for completely unattended recording (I’ll often record one side as I go to bed and another before heading off to work). The gaps in the play-out groove will be taken care of pretty much automatically, and you’ll be able to adjust everything later.
When recording is complete, switch to the Split Tracks tab and click Lookup Track Listing. Use the “Database” drop-down to tell VS where to look for metadata – I have the best luck with MusicBrainz and Discogs, but there are other options. Keep in mind that all of the data in these databases is submitted by end users like you. That means the album covers will all be shot differently, and the track lengths and placements will be slightly different. Since there are often many different pressings of the same album, and because people start/stop recording at different times, expect to see quite a bit of variation in these. The nice thing is you can mix and match – use the album art from one listing, and the track list from another, for example. And you’ll be able to override any of the discovered information later if necessary.
Click Import Album Art when you find the best cover shot, and Use Selected Listing when you find the track list that best matches the record you’re actually working with. Then click Close.
If you’re lucky, all of the suggested track breaks will pretty much line up on the waveform with your actual record. In some cases, however, the breaks (the red lines) will match at first, then drift pretty badly. If this happens, you have three choices. You can 1) Return to Lookup and try to find another listing that fits your actual tracks better, or 2) Keep the listing and adjust it manually (not difficult), or 3) Click the Scan for Trackbreaks button and let VS auto-detect the breaks. The cool thing is, if you try approach #3, the actual track titles you got from the lookup will be retained – only the track lengths will be altered. VS does everything it can to keep your workflow as pain-free as possible.
Track breaks were found from a Discogs lookup for this double LP, but they’re way off. Manual track alignment is needed with virtually every album – some more than others.
If your record couldn’t be found in any of the lookup services, things get a bit more manual. Click “Scan for Trackbreaks” and let VS do its thing – about 10 seconds later, you’ll see breaks placed at the best-guess locations, which are usually pretty good (but you’ll still need to massage them). Make sure VS shows as many tracks are on the actual album – if not, you’ll need to study the waveform even more closely to find the ones it missed. Place the cursor where you want a break and hit Cmd-B to insert a new break. When the number of tracks match, double-click the track names in the list to type in the actual titles.
Even though you’ve gotten a big leg up by pulling in metadata from Discogs and Musicbrainz, you’ll quickly realize that the timestamps for the track breaks retrieved are from other people’s recordings – because people hit Record at different times, they’re going to be off by anywhere from 2-20 seconds, which means you still need to manually massage every single track break to get it right.
Some LPs are really difficult to split up. For example, my 1953 Folkways recording “Leadbelly’s Last Sessions.” The bands (tracks) on the LP are divided into Band 1, Band 2, Band 3, etc. But within each of those bands are multiple songs. Band 1 actually consists of three different songs, with no clear separator between them. Should I split it across bands or try to find the song breaks, which are tough to listen for and aren’t visible in the waveform – he’s talking in the background between the actual songs. I’d like to have tracks named for songs of course, but it’s ambiguous and going to be an even more manual/time-consuming job than usual. To make matters worse, this is one of the few LPs I have that can’t be looked up in any of the metadata listing services. The easy way out would be to just split it on album sides (sides 1-4). That would leave me with no metadata at all, but would be far easier. Fortunately this kind of situation doesn’t come up too often, but when it does, you just have to make judgement calls. In this particular case, I decided to discard the encoding and just keep the LP.
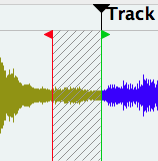
Now to finesse the breaks – the most manual part of the process. Start by zooming in close – you can use either the +/- icons, or the scroll wheel on your mouse. Note that each track break has a double-ended arrow at the top – green for start, red for end. You can turn the breaks into “gaps” by holding down the Shift key and dragging the break line. This creates a shaded area that will be excluded from the final output. The general process is:
- Zoom in, drag the playhead (the black line) to the area you want to study, and use the Spacebar to start/stop playback. Move the playhead to a position close to the end of a track, hit Spacebar, and listen until the track fades to absolute silence, then hit Spacebar again to stop playback.
- Drag the track break line to the to the black playhead line.
- If you want to cut out some of the space (so there aren’t long silences at the start and end of your output tracks), hold down Shift while dragging the break line. As you drag, a shaded gap will become visible.
- Hit Spacebar again and playback will resume from the end of the gap. Adjust the in- and 0ut-points for the gap until there’s about a second of silence before/after detectable audio of the previous/next track.
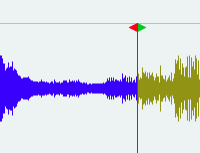
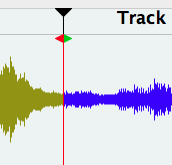
Pictured: The auto-discovered track break was off by about 15 seconds. Fixing this was a four-step process: Listen/view for the correct end of the previous track and put the playhead there; Move the break line to the cursor line; Shift-drag the break line to create a gap; Dial in the position for the end of the gap.
When your track splitting work is done, the waveform should look something like this, with some tracks being separated by gaps (especially between album sides), others not.
With splitting done, it’s time to determine whether the recording will sound better with the audio cleaned up or not. Since there’s a small impact on audio quality with every correction you make, you want to keep these to a minimum, and only apply them on an as-needed basis. In truth, I found that most of my records had enough pops and crackles to make it worth applying click correction to most records. Use your ears, and use your judgement.
Go to the Cleanup tab and find the icon on the bottom toolbar that looks like a double-ended checkmark (circled in red here), which is the Scan for Clicks option. VS will show a dialog with a bunch of sensitivity options. These are well-documented, and all I can say is “read and experiment.” I just took the defaults with most recordings.
![]()
Red circle: The click removal tool. Red square: Toggle click protection on or off.
The process will take a minute or two, depending on the speed of your computer.
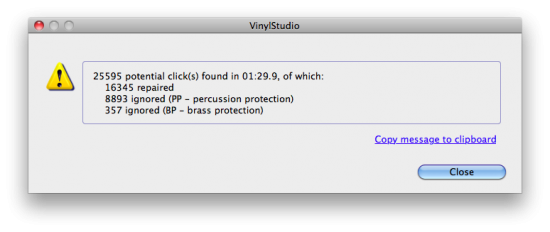
It’s pretty amazing how many clicks VS will find and remove – don’t be surprised to see the final count measured in thousands.
Once the process is complete, it’s time to put on your ear goggles and listen carefully with click removal on and off. Use the gamma symbol icon (outlined with red square above) to toggle. Check both dense and sparse passages, listening carefully for the impact of click removal on tonality and range. The difference will be fairly subtle if you used VS’s default settings, but it is noticeable. Again, you’ll want to make this judgement on a per-record basis. If a record is in great shape, you’ll be better off not using click protection.
Now you’re ready to export. Select the Save Tracks tab and you’ll see a list of all the albums you’ve recorded. You can either export your albums to MP3 one at a time, or do them in batches (I’m doing them in batches of around a dozen). Dig around and you’ll find options to select the output format, bit rate, and whether to have albums added to iTunes. Since the MP3 encoding process can take a while when batch processing, this is something you might want to do once a week, before going to bed.
When export is complete, switch over to iTunes and select the Recently Added playlist. Make sure all of the recently added tracks have solid metadata (they should at this point) and album art. If you weren’t able to find album art in the Lookup stage, now is the time to search for the album title in Google Images and save the highest quality album cover you can find to your desktop. Select all the tracks in that album, hit Cmd-I, and drag the image from the Finder to the Artwork square in the iTunes info panel. Alternatively, you can try the Pollux shareware app to retrieve missing metadata and cover art, but I found I didn’t need it much.
Keeping Archival Copies
 Maybe you want to save MP3s to your collection or to an iPod, but also want to keep high-def AIFF or FLAC files around for posterity. VinylStudio makes this two-phase workflow natural by baking it into the process. Initially, you set up your recording preferences, which refer to the native/internal recording format. Go ahead and set this to some high-resolution format. These will become the “Albums” you record into VinylStudio, while creating MP3s out of them comes as part of the export process (“Save Tracks”). If all you want out of the deal are MP3s, you can always delete the internal “Albums” later. Personally, I worked it like this:
- Set internal Album recording format to AIFF
- Process a dozen or so albums, skipping the Save Tracks (export) step
- Before going to bed one night, go to Save Tracks, select all, and output to MP3 VBR0 (and import to iTunes)
- Delete all the saved Albums from the Save Tracks tab.
If I wanted to keep the high-resolution AIFF originals in an archive, I would simply skip step #4, and manually copy those AIFF files from the Finder to a long-term storage drive or service.
That’s it! You’re digitalized, baby. Keep at it – you should be able to complete 2-3 albums a day during the work week and more on the weekends. I expect I’ll be at it for the better part of 2011… before pillaging my friends’ collections for more :)
Update, end of 2011: There were around 500 LPs altogether, but many I had since also acquired on CD or MP3, so didn’t need to do those. Also skipped quite a few that were just too surface noisy. That left around 300. Here’s a little screencast of the ones that actually needed digitizing. I also got really anal about finding good cover art. What I couldn’t find on the net, I photographed myself.
Once you finish digitizing your collection, see also:
How To Listen to Your Home iTunes Collection from Work


